Build Plate Assembly

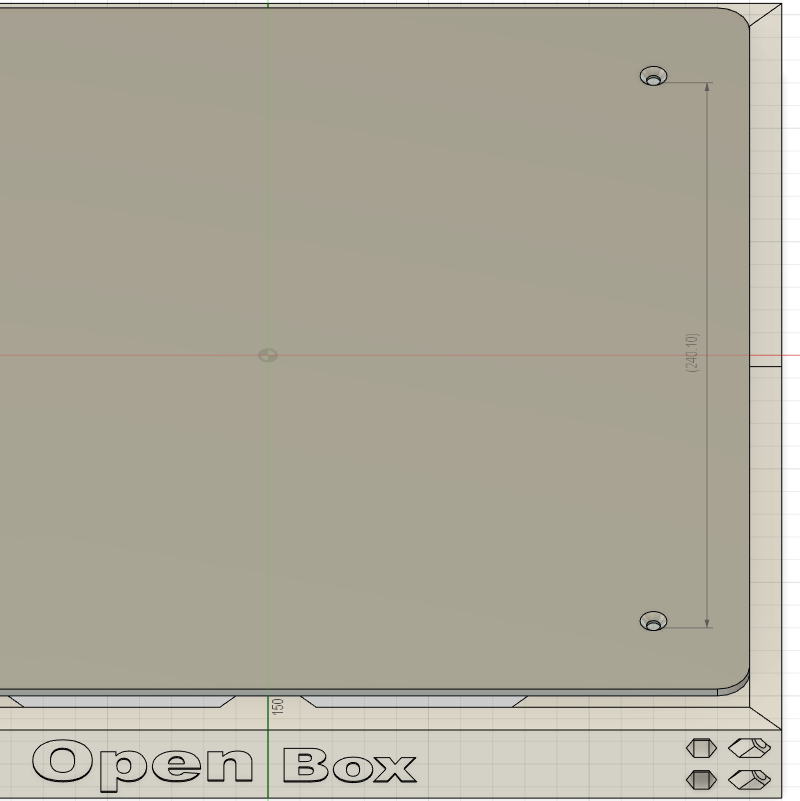
The print bed frame is designed to be usable with almost any sized printing bed that has mounting holes that are at most 290mm apart width and length. To accommodate varying-sized beds there are 4 corner pieces that can be modified to adjust the location of the print bed mounting holes. Unfortunately, I made the corner pieces in Fusion 360 and not OpenSCAD so there is no way to modify the part using something like the Thingiverse Customiser. Thus if you use a print bed that is different from the one I used you will have to modify the Build Plate Frame Adapters in your preferred CAD software.
Parts List
Hardwear
- Build Plate
- Build Plate Compression Springs (x4)
- M4x45mm Bolts or screws (x4)
- M4 Nut (x4)
- M4 Bed Level Knob (x4) [Optional]
- M5x12 Flat Cap Hex Bolt (x32)
- M5 Nuts (x32)
3D Printed Parts
- Bed Frame Mount A (x2)
- Bed Frame Mount B (x2)
- Bed Frame Blank A
- Bed Frame Blank B
- Bed Frame Front A (or Bed Frame Blank A)
- Bed Frame Front B (or Bed Frame Blank B)
- Build Plate Frame Adapter (x4)

This is the type of hex bolt required. Using the wrong bolt could lead to problems assembling the print bed frame.
Print Bed Frame Assembly
Assembling the print bed frame is fairly straightforward. Start by inserting a nut into each of the holes. Next, the front is assembled using the Bed Frame Front A and B parts (or if you don’t want the logo the Bed Frame Blank A and B parts) and the back is made using the Bed Frame Blank A and B parts. The left and right are made of 1 Bed Frame Mount A and 1 Bed Frame Mount B each. I suggest attaching the Front Parts (Bed Frame Front A and B), Back Parts (Bed Frame Blank A and B) and Side Parts (Bed Frame Mount A and B) together first.

Once the sides are assembled you will need to assemble the corners. The corners are a little more difficult as it can be hard to bolt parts together.
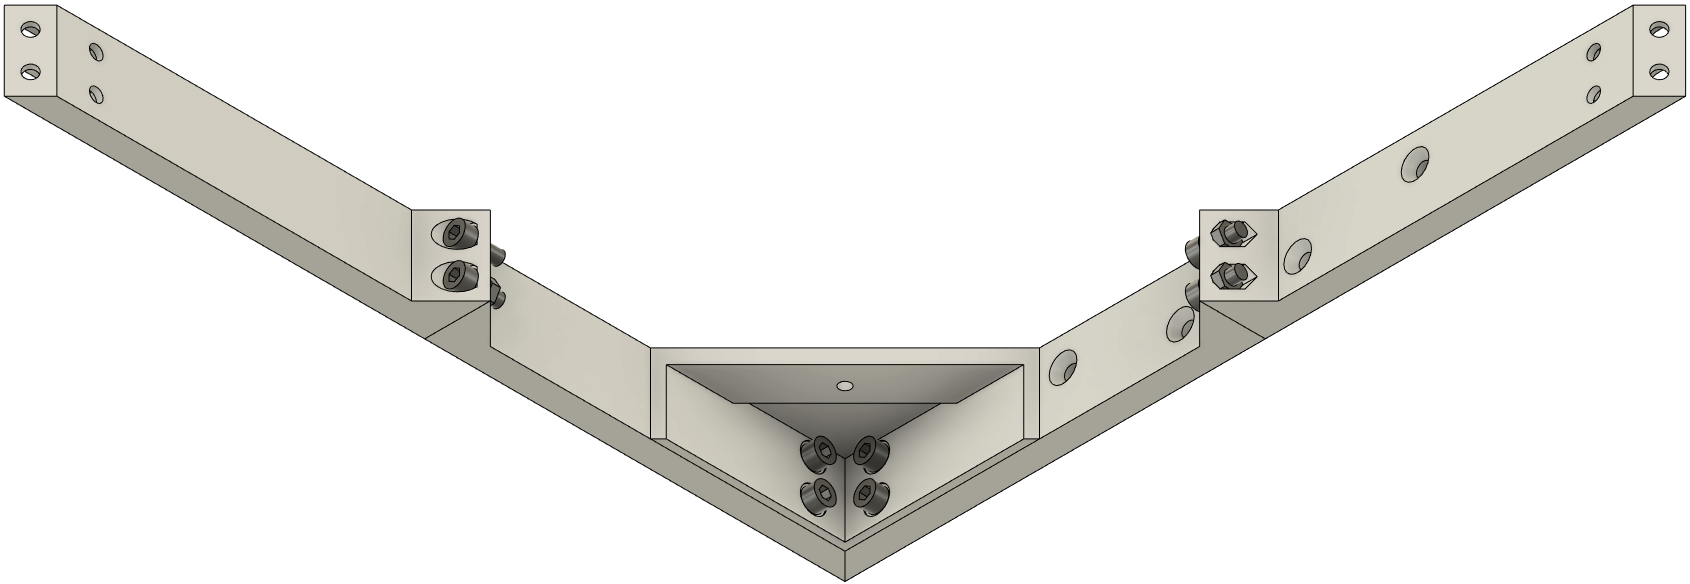
Ensure that the side pieces are correctly aligned, the Bed Frame Mount pieces need to have the two lower mounting holes close to the middle and the upper mounting holes need to towards the corners

Build Plate
Depending on the Build Plate you selected these assembly instructions may be different however generally you will bolt the Build Plate to the Print Bed Frame using the M4x45mm Bolts, a spring in between the Build Plate and the Print Bed Frame with a captive M4 nut in the M4 Bed Level Knob to hold down the Build Plate.
